Linux Web Hosting

Creating a Database

Databases

Most modern websites cannot exist without a database running quietly behind the curtains and handling the website’s data.
In other words, all of your website’s content, all the pages, all the posts, and all the user data is kept in the database.
As you would expect by now, cPanel has a pretty extensive module allowing you to create and manage databases.


Creating a Database

If you want to set up any modern website using a CMS, you’ll need to create a database for it first.
The “DATABASES” section of cPanel has a handful of options available:


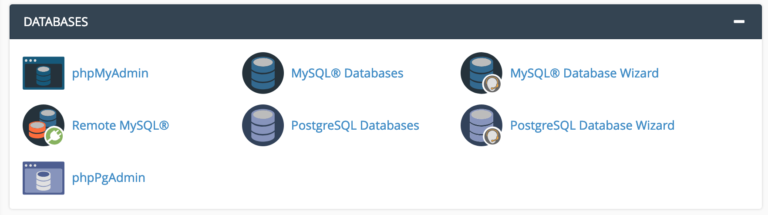
Most importantly, cPanel allows you to work with both MySQL and PostgreSQL databases. For the purpose of this guide, we’ll stick to MySQL, but working with PostgreSQL is nearly the same.
To create a new database, click on “MySQL Database Wizard” in the “DATABASES” section (see above).
Once there, you can start setting up your new database.

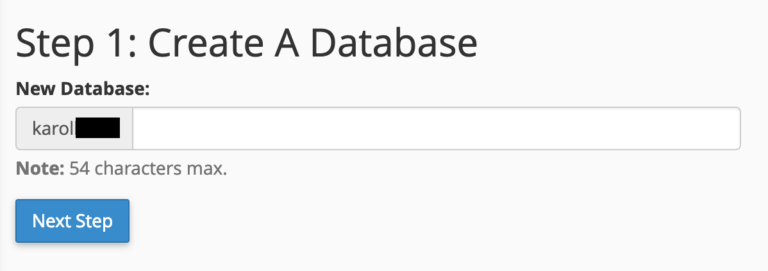
Step 1: set a name for your database:


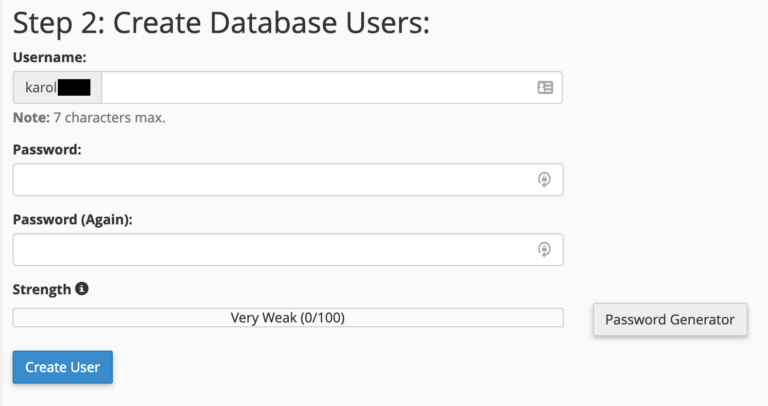
Step 2: create a database user that will be used to access the database (this is required in order to work with the database later on):


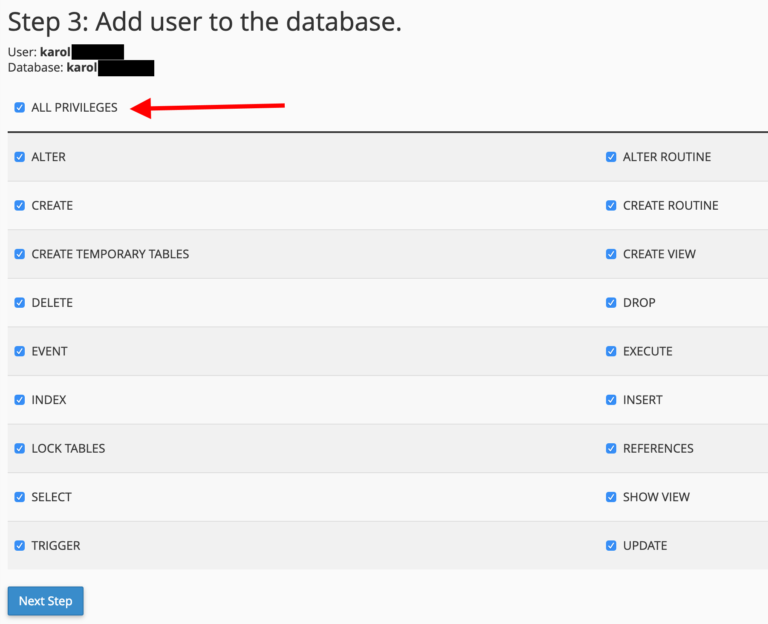
Step 3: assign the required privileges to that new database user; it’s best to select the option labeled “ALL PRIVILEGES”, like so:


Step 4: done.

At this stage, your new database has been set.
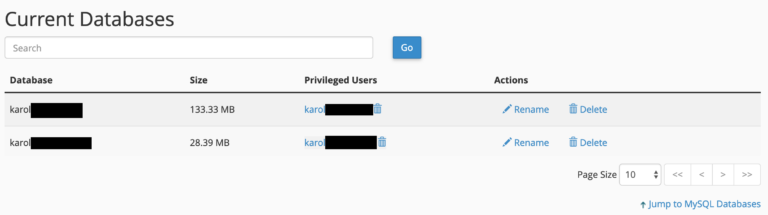
To see it, go back to the main page of cPanel and click on “MySQL Databases”.


Managing Databases

To see all your databases, go to “MySQL Databases” from the “DATABASES” section of cPanel.


Each database can be renamed or deleted through the links to the right.
Additionally, you can also manage your database users there, a bit further down the page.


Backing Up Your Website

If you’ve ever had a phone or computer die on you, you know how devastating it can be if you haven’t backed up your data.
Now imagine the same happening to your website. This is perhaps even worse since it’s very likely your website is your business.
Luckily, cPanel makes it incredibly easy to keep this tragedy from happening by giving you a chance to back up your site manually – any time you choose.
To start a backup, click the “Backup Wizard” icon that’s in the “FILES” section of cPanel.


You’ll see this screen:


Click on the “Back Up” button to start the backing up process. You’ll be shown a screen where you have the option to choose whether you want a full backup (all the files and configurations on your websites) or partial backups (home directory, MySQL databases, email forwarders & filters).
To make it easier, back up your entire account and save it to an external hard drive or another secure location.


Once the backup completes, you’ll be able to download it.

Follow the links in the right sidebar above (below if you're on your phone) in order to learn about cPanel.