One of the great things about keeping your domain name with a cPanel-enabled web host is that you also get the possibility to create custom email accounts for that domain.
This all happens in the “EMAIL” section of cPanel.
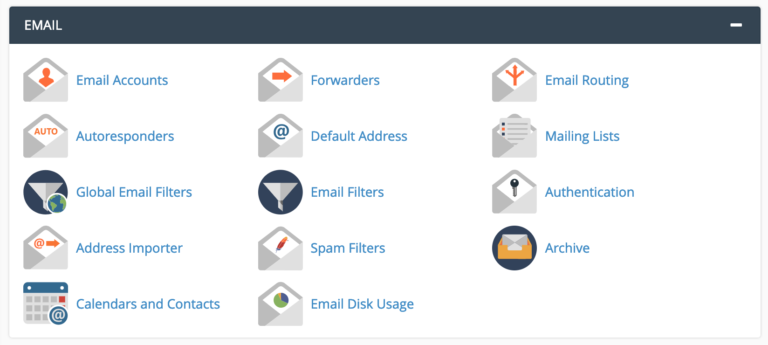
As you can see, there’s plenty of tools there – from creating new emails, setting forwarders, autoresponders, taking care of spam, and more.
Naturally, this is the first thing you will want to do. To add a new email account to your domain, click on “Email Accounts” to be taken to the following screen (make sure you’re on the first tab – “Add Email Account”):
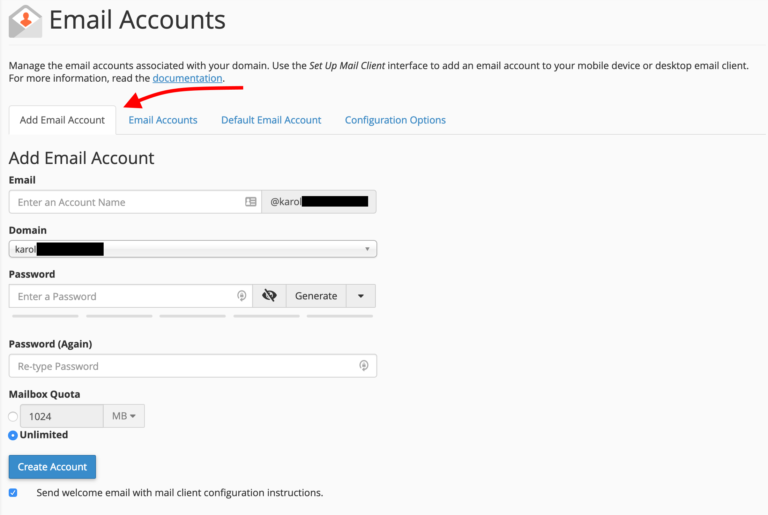
From top to bottom, here’s how to get your new account set up:
- In Email, enter the address you'd like to be reached at – for example, "hello" or "yourname"
- In Domain, select the proper domain name from the drop-down field. If you haven't added your domain name to cPanel yet, you'll need to do that first.
- In Password, create a password and make sure it's a secure one!
- In Mailbox Quota, adjust to make sure your email can work properly. Remember: emails take up space on your server, so you may not want to give everyone unlimited access. However, 1GB (=1024MB) is a reasonable minimum.
- Click on "Create Account"
Once you’ve done all of the above, you’ll notice that the email you just created has been added to the list of the existing email accounts in the “Email Accounts” tab:
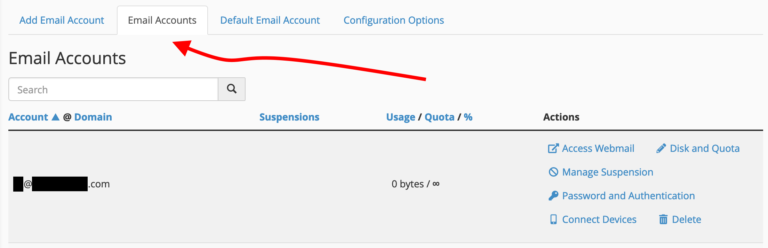
You can manage every element of that account later on – including the password, quota, and other details.
Using Your Email
Now that you’ve set up an email account – how do you use it?
You have two main options here:
- Configure the email in an email client - like Gmail, Apple Mail, Outlook, etc.
- Use webmail
Let’s start with the former:
How to Configure Your Email Locally
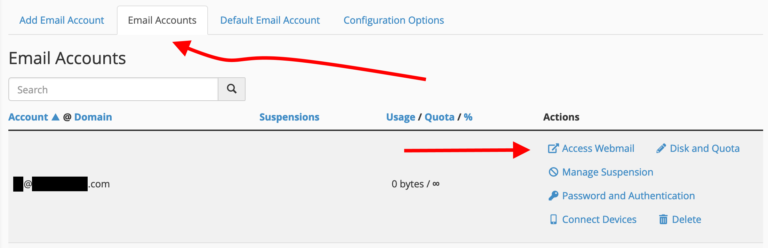
This step starts a bit counterintuitive, but bear with us. So, to actually configure your email locally, you first need to click on the “Access Webmail” link that’s visible next to your address in the “Email Accounts” tab:
This will take you to a new panel. Once there, scroll down to the section labeled “Mail Client Automatic Configuration Scripts”. You’ll see something like this:
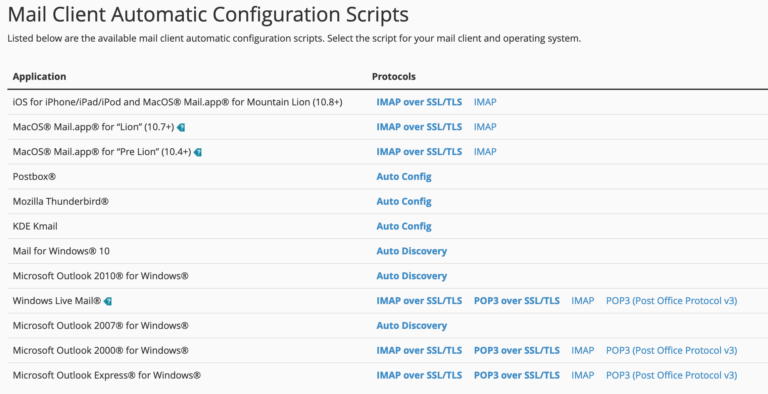
There’s a range of useful links there, all of them with either instructions or ready-made configuration scripts for some of the most popular email clients. If yours is on the list, just click on the link next to it and finish the configuration according to the advice given.
If you can’t see your client, or you want to configure your email manually, then below this section is another one labeled “Mail Client Manual Settings”.
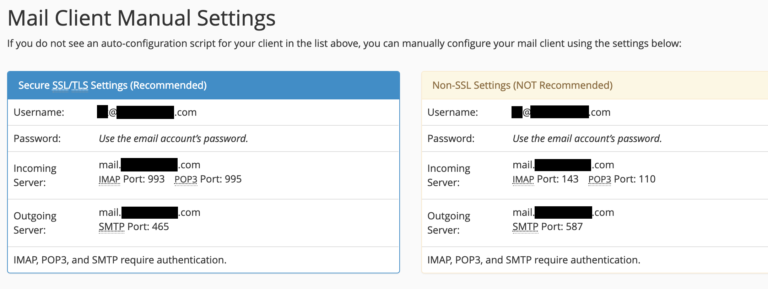
You’ll find all the info you need there.
Accessing Your Webmail
At this point, accessing your webmail is very easy. Click on the “Access Webmail” link that’s visible next to your address in the “Email Accounts” tab:
Once there, click on one of the available webmail clients:
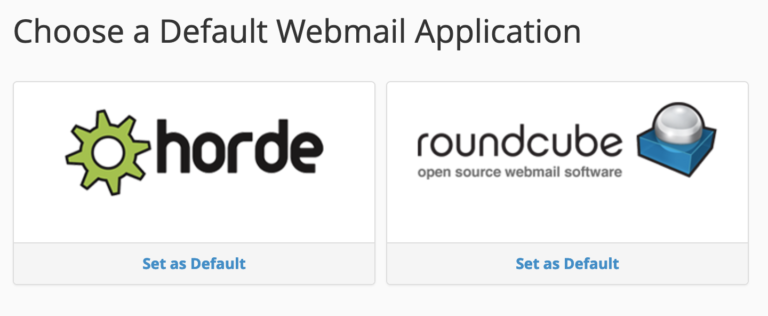
You’ll be taken to your email inbox immediately.
Alternatively, you can access your webmail straight from a web browser. A webmail login button is located on the top right of all of our website pages (simply click on it and you will be taken to the webmail login screen) also, you might simply navigate to http://YOURDOMAIN.com/webmail and you’ll be greeted by the same screen:
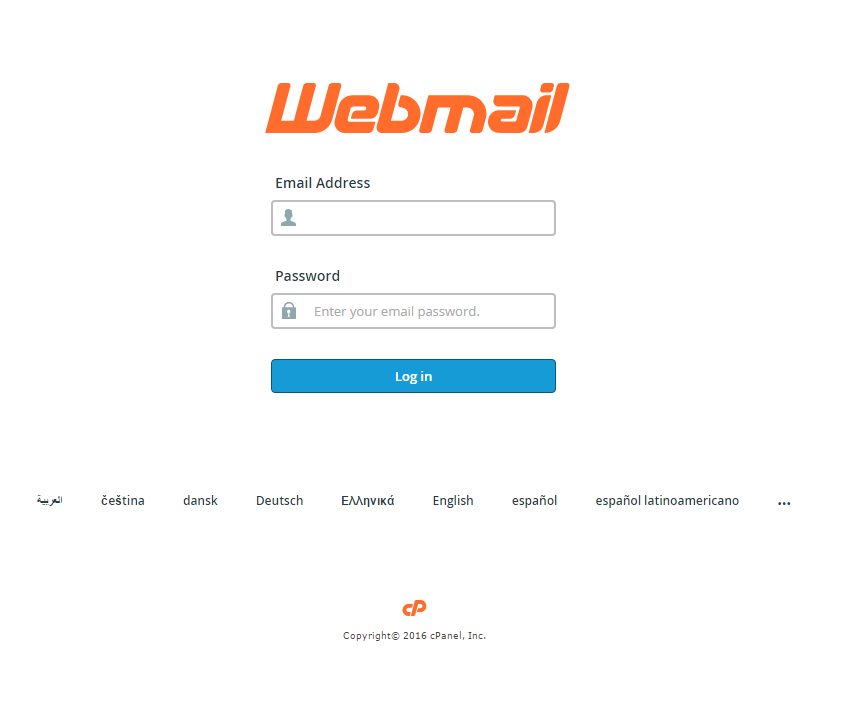
Enter the email address and password, and you’re in.
Forwarding Your Email to Another Address
Let’s say you want to have your emails that arrive at [email address] to be forwarded to another address you already own – like [email address].
First, click on “Forwarders” to arrive on this screen:
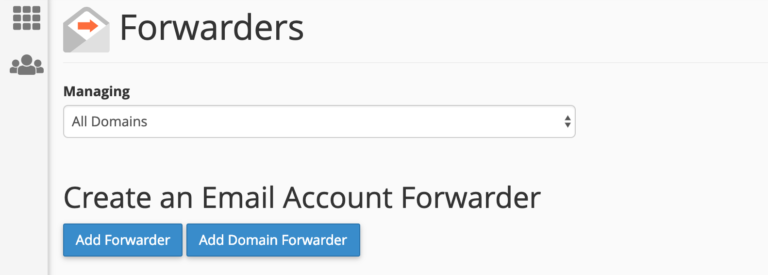
From here, you can either create a simple email forwarder or a more serious forwarder for your whole domain name. We’ll stick with the former here.
To forward your email, click on the “Add Forwarder” button. You’ll see this:
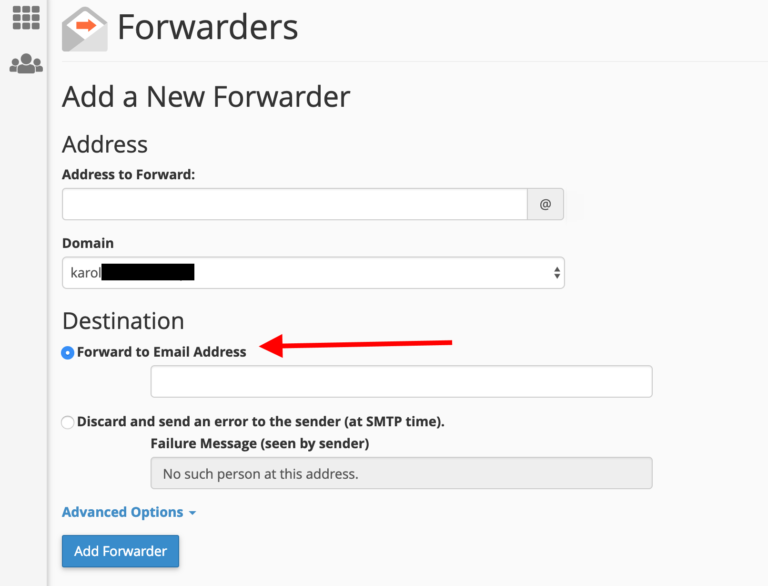
Here’s what these fields mean:
- Address to Forward - here, enter just the user part of the email address that you want to forward. For example, if your email is "john at domain.com" then the user part of it is "john"
- Domain - this is the domain part of the email address that you want to forward. For example, if your email is "john at domain.com" then the domain part of it is "domain.com"
- Destination - you get two options here. However, to effectively redirect your email to an existing other address, select "Forward to Email Address". In the field below, enter the full email address where you want to redirect the messages.
Click on “Add Forwarder” to set everything up.
Setting Up a Default Address
Default email addresses are an interesting perk that you get when hosting your email inboxes yourself – as you do with cPanel.
Basically, you have the ability to catch any incoming email that is sent to an invalid email address under your domain name.
What this means in practice is that you can use nonexistent email addresses when signing up for various online tools/services/profiles and still have those emails get to you no problem.
Here’s an example; let’s say you have just one email address set up for your domain name, and it’s [email address]. However, when signing up for Netflix, you don’t want to use that address since you’re worried that it might eventually leak onto the web and get picked up by spambots. In that case, you can just use something like [different yahoo email address] and still make it work.
Here’s how to set that up:
Click on “Default Address” from the “EMAIL” section in cPanel:
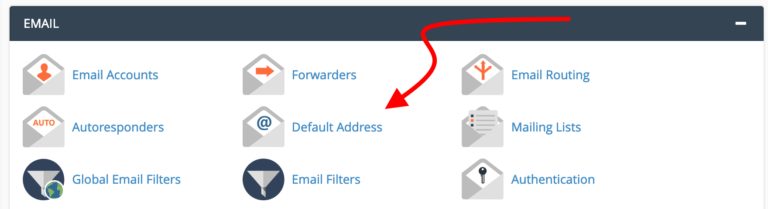
You’ll see this:
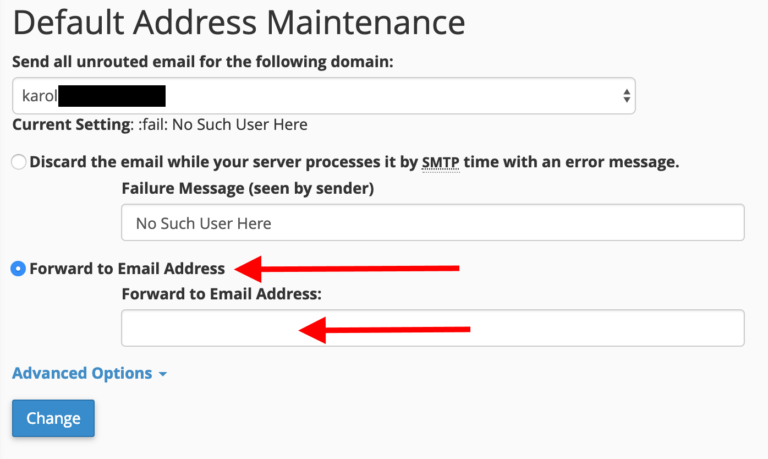
- Select your domain name from the drop-down.
- Tick the box labeled "Forward to Email Address".
- Enter your existing email address into the box below.
- Click on the "Change" button.
You’re all set.
Setting Up Spam Filters
Everybody hates spam, luckily, with cPanel, you can keep it from ever hitting your inbox.
Click on “Spam Filters” to see the available options:
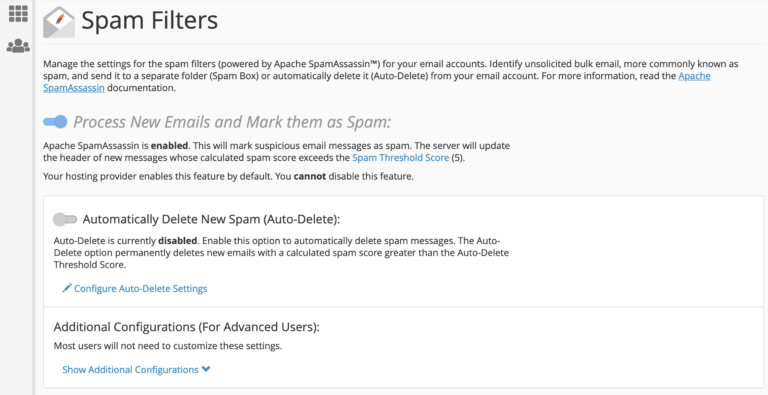
Depending on the settings that your web host allows, you may or may not be able to do much in this section. The spam filters themselves are often on by default and you cannot disable them (like it is in my case). However, you can still fine-tune how the filters work.
The first setting to consider is the one labeled “Automatically Delete New Spam”. While it may seem like a good idea at first, you’re actually better off leaving that one. The issue here is that you can encounter a lot of false positives with spam filters – emails that are falsely graded as spam. Therefore, you want to be able to take a look into your spam folder every once in a while and have a quick glance if anything there requires your attention. With the auto-deletion turned on, you won’t have this possibility.
Under “Additional Configurations”, there’s a link to show more options. Once you click on it, you’ll see this:
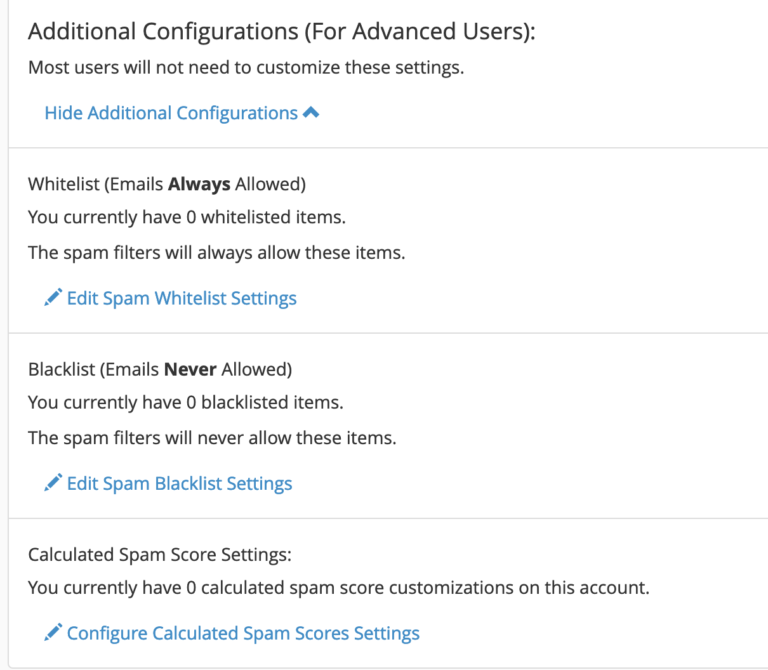
You can experiment with these settings to manually whitelist or blacklist certain email addresses. It’s probably a good idea to whitelist all emails from your company or any other crucial contacts from your network.
Follow the links in the right sidebar above (below if you're on your phone) in order to learn about cPanel.